




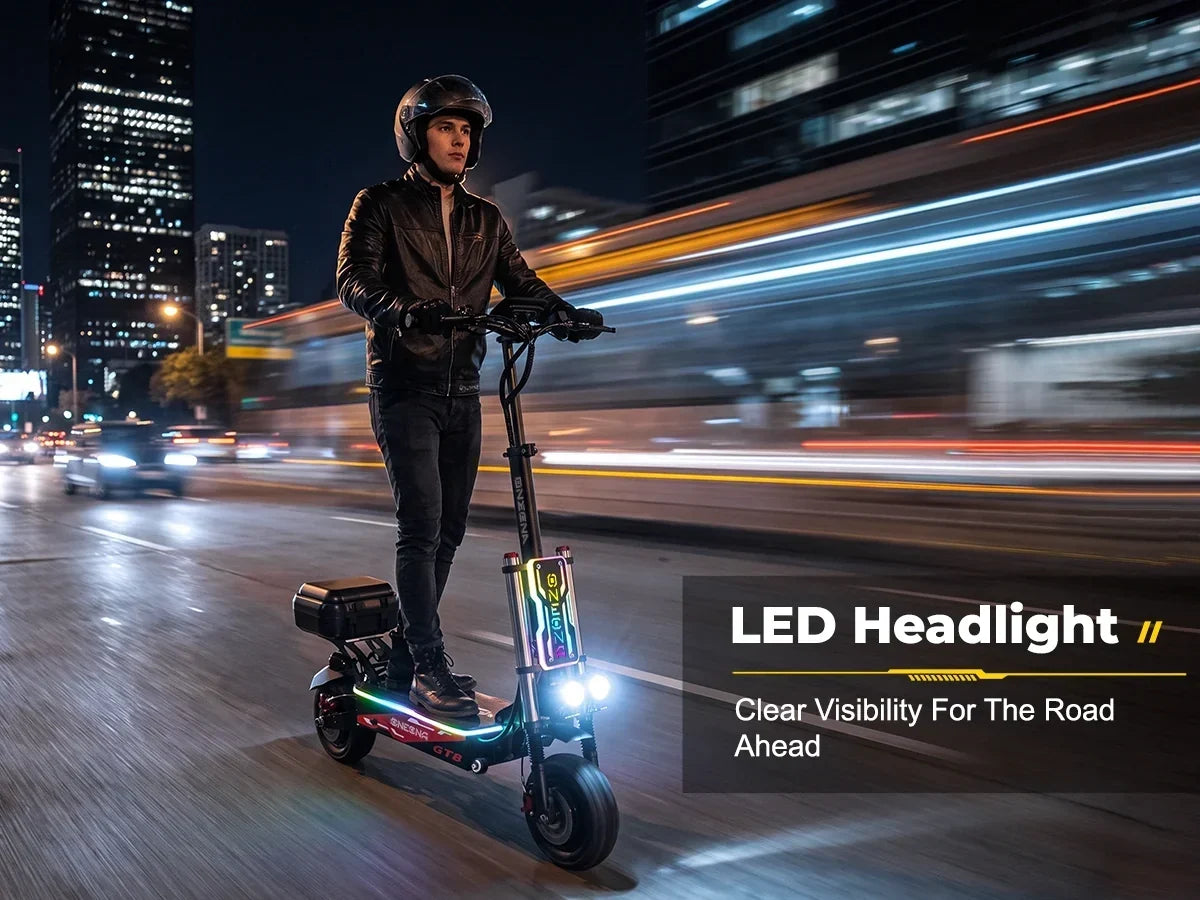
E Scooter LED Light: A Complete Guide to Safer and Brighter Riding
An e scooter LED light is one of the most practical upgrades any rider can make — not for style, but for survival. Whether you're cutting through a dimly lit bike lane at 6 AM or finishing a late commute downtown, the difference between a 50-lumen stock headlight and a properly spec'd 800-lumen LED setup is the difference between being seen and being invisible. This guide breaks down everything: what types exist, why lumens and beam angle matter more than brand names, how to install and aim your lights correctly, when local laws require them, and how to compare the options that actually hold up in real-world riding conditions.
Table of Contents
- Why E Scooter LED Lights Matter More Than You Think
- Types of E Scooter LED Lights Explained
- Key Specs: What the Numbers Actually Mean
- Legal Requirements by State (US Overview)
- Headlight vs. Tail Light vs. Ambient: Do You Need All Three?
- Comparison: Stock Lights vs. Aftermarket LED Upgrades
- How to Install and Aim Your E Scooter LED Light
- When Should You Upgrade? Riding Scenarios Explained
- Buying Guide: How to Choose the Right LED Light Setup
- FAQ
1. Why E Scooter LED Lights Matter More Than You Think
Most riders underestimate how invisible they are at night. Studies from the National Highway Traffic Safety Administration (NHTSA) consistently show that low-light conditions account for a disproportionate share of micromobility accidents — not because riders go faster, but because neither the rider nor surrounding traffic can see clearly.
Stock lights on most entry-level and mid-range scooters are designed to meet minimum compliance thresholds, not to actually illuminate your path. A 50–100 lumen headlight might make you technically legal in some states, but it won't light up a pothole 15 feet ahead at 18 mph. That's where aftermarket LED upgrades change the equation entirely.
Beyond personal safety, visibility affects how other road users — drivers, cyclists, pedestrians — perceive and react to you. A bright, well-aimed front LED and a flashing red tail light dramatically reduce your risk of being cut off, doored, or simply overlooked at an intersection.
Bottom line: Your e scooter LED light isn't a luxury. It's the cheapest safety investment you can make per dollar spent.
2. Types of E Scooter LED Lights Explained
Not all scooter lights serve the same purpose. Understanding the categories helps you build a complete lighting system rather than just slapping on one bright headlight and calling it done.
Headlights (Front LED)
The primary forward-facing light. Its job is twofold: illuminate the road ahead so you can see, and make you visible to oncoming traffic. Look for a wide beam angle (60°–90°) for urban riding and a narrower, more focused beam for higher-speed suburban paths.
Tail Lights (Rear LED)
Rear-facing red lights, often with a flashing mode. These are critical for being seen by vehicles approaching from behind. Many jurisdictions legally require a rear reflector or active tail light for night riding. A flashing tail light at 50–100 lumen is far more attention-grabbing than a steady one.
Brake Lights
Some advanced setups integrate with the scooter's braking system to illuminate brighter when you decelerate — similar to a car's brake light. This is particularly useful in stop-and-go urban traffic.
Ambient / Underglow / Strip Lights
Decorative LED strips along the deck or frame. These don't improve your forward visibility but do increase your side-profile visibility to cross-traffic. They're a secondary safety layer, not a replacement for proper headlights and tail lights.
Turn Signal LEDs
Increasingly common on higher-end scooters. Handlebar-mounted or integrated turn signals reduce the need to take a hand off the bar to signal, which improves stability at speed.
3. Key Specs: What the Numbers Actually Mean
When shopping for an e scooter LED light, you'll encounter a wall of specs. Here's what actually matters:
Lumens (lm) — Brightness Output
Lumens measure total light output. For context:
- Under 200 lm: Compliance-only. Adequate for well-lit urban streets where you mainly need to be seen, not to see.
- 200–500 lm: Practical range for most city commuters. Illuminates the road 10–20 feet ahead at moderate speeds.
- 500–1000 lm: Recommended for mixed urban/suburban riding, paths without street lighting, or speeds above 20 mph.
- 1000+ lm: High-performance territory. Useful for rural paths, trails, or high-speed commuting. Can blind oncoming riders if not properly aimed.
Beam Angle
A wide beam (80°–120°) spreads light across the road surface — better for slow urban riding where you need peripheral awareness. A narrow beam (20°–40°) throws light farther ahead — better for faster riding on unlit paths.
IP Rating (Water Resistance)
Look for at least IP65 for any light you plan to use in rain or wet conditions. IP67 is better. Anything below IP54 will likely fail within a season of regular use.
Battery Life / Power Source
Integrated lights draw from the scooter's main battery. Aftermarket clip-on lights use their own rechargeable cells. For integrated setups, check whether the headlight dims as the battery depletes — a common issue on budget scooters.
Mounting Type
Handlebar clamp diameter matters. Most scooters use 22mm or 25.4mm bars. Verify before purchasing any aftermarket light.
4. Legal Requirements by State (US Overview)
E scooter lighting laws vary significantly by state and even by city. This is not legal advice — always verify with your local DMV or municipality — but here's a general framework:
- California: Requires a white front light visible from 300 feet and a red rear reflector or light visible from 500 feet when riding at night.
- New York: Requires front white light and rear red light or reflector for nighttime operation on public roads.
- Texas: Front lamp (white) and rear red lamp or reflector required after dark.
- Florida: Front lamp visible from 500 feet, rear lamp or reflector visible from 600 feet.
- Washington: Front white light and rear red reflector required; active rear light recommended.
A consistent pattern: most states require a white front light and a red rear reflector or light for any nighttime riding. Some cities (e.g., San Francisco, NYC) have additional requirements for shared/rental scooters that may influence what manufacturers build into their products.
Practical takeaway: Even where the law only requires a reflector, an active LED tail light is always the safer choice.
5. Headlight vs. Tail Light vs. Ambient: Do You Need All Three?
Short answer: for serious night riding, yes. Here's how to think about it:
Headlight alone means you can see ahead, but vehicles approaching from behind or the side may not notice you until it's too late. This is the most common single-light setup and the most dangerous gap.
Headlight + tail light covers the two most critical angles — front and rear. This is the minimum recommended setup for any rider who commutes or rides after sunset regularly.
Full system (headlight + tail light + ambient/side strips) maximizes your 360° visibility profile. Side-profile visibility is often overlooked but matters most at intersections where cross-traffic approaches from 90°.
For casual daytime riders who occasionally get caught out after dark, a quality headlight and a clip-on flashing tail light covers 90% of scenarios. For dedicated night commuters, a full integrated system is worth the investment.
6. Comparison: Stock Lights vs. Aftermarket LED Upgrades
This is where most riders face their first real decision. Here's an honest side-by-side:
| Feature | Stock Integrated Light | Aftermarket LED Upgrade |
|---|---|---|
| Brightness | 50–200 lm (typical) | 300–1500 lm (range) |
| Beam Control | Fixed, often poorly aimed | Adjustable angle, multiple modes |
| IP Rating | Varies; often IP54 or lower | IP65–IP67 common in quality units |
| Battery Draw | From main battery (reduces range) | Independent battery (no range impact) |
| Installation | None required | 5–15 minutes, tool-free clamp |
| Cost | Included in scooter price | $15–$120 depending on spec |
| Replaceability | Requires manufacturer parts | Universal; easy to swap |
Who should stick with stock: Riders who commute in well-lit urban areas, rarely ride after dark, and want zero maintenance overhead.
Who should upgrade: Anyone who regularly rides in low-light conditions, on unlit paths, at speeds above 15 mph, or in areas with heavy vehicle traffic.
For reference, scooters like the ONECNA GT9 come with integrated front and rear lighting as part of the base build — which covers legal minimums — but riders who push into longer evening commutes often add a secondary handlebar-mounted LED for the extra throw distance.
7. How to Install and Aim Your E Scooter LED Light
Installation (Handlebar Clamp Type)
- Measure your handlebar diameter (22mm or 25.4mm are most common).
- Loosen the clamp on the light mount — most use a single hex bolt.
- Slide onto the handlebar at your preferred position (center or offset to avoid bell/brake lever conflict).
- Tighten to finger-tight first, then a quarter-turn with the hex key. Don't overtighten — you want the light to rotate under impact rather than snap.
- Route the USB charging cable so it doesn't interfere with steering.
Aiming the Headlight
This step is almost always skipped and almost always matters. A headlight aimed too high blinds oncoming riders. Too low and you're only illuminating 5 feet ahead.
- Stand your scooter on flat ground, 10 feet from a wall.
- The center of the light beam should hit the wall at approximately handlebar height or slightly below.
- Adjust the mount angle until the hotspot (brightest center) is aimed 10–15 feet ahead on the road surface when riding.
Tail Light Placement
Mount as high and as rearward as possible — typically on the seat post, rear fender, or helmet. The higher the mount, the more visible it is to vehicle drivers whose sightlines are elevated compared to a low-mounted deck light.
8. When Should You Upgrade? Riding Scenarios Explained
Not every rider needs the same lighting setup. Here's a scenario-based breakdown to help you decide:
Scenario A: Urban Day Commuter (Occasional Evening Rides)
Recommendation: Stock headlight + clip-on flashing tail light ($15–$25). The city's ambient lighting does most of the work. Your main goal is being seen, not illuminating the road.
Scenario B: Suburban Commuter (Mixed Light Conditions)
Recommendation: 400–600 lm aftermarket headlight + integrated or clip-on tail light. You'll encounter stretches without street lighting. A brighter headlight prevents pothole surprises.
Scenario C: Dedicated Night Rider / Long-Distance Commuter
Recommendation: 800–1200 lm headlight with adjustable beam + active brake-light tail light + optional side strips. You're spending significant time in low-light conditions at higher speeds. Full visibility system is justified.
Scenario D: Trail / Off-Road Riding After Dark
Recommendation: 1000+ lm with narrow beam throw + helmet-mounted secondary light. Uneven terrain at speed requires maximum forward illumination. A handlebar light alone won't cover the full field of view when cornering.
9. Buying Guide: How to Choose the Right E Scooter LED Light
Use this checklist before purchasing:
Step 1 — Define Your Primary Use Case
Are you buying for visibility (being seen) or illumination (seeing the road)? Most urban riders need the former. Suburban and trail riders need both.
Step 2 — Check Your Scooter's Handlebar Diameter
22mm is standard for most consumer scooters. Performance models sometimes use 25.4mm or 31.8mm. Confirm before ordering.
Step 3 — Set a Lumen Target
Use the scenario guide above. Don't over-buy — a 1500 lm light on a city commuter is overkill and will blind other riders.
Step 4 — Verify IP Rating
If you ride in any weather, IP65 minimum. IP67 if you ride through puddles or heavy rain.
Step 5 — Check Battery Independence
Integrated lights that draw from the main battery will reduce your range. If range matters, choose a light with its own rechargeable cell.
Step 6 — Look for Multiple Modes
Steady, low, high, and flash modes give you flexibility. Flash mode for daytime visibility; steady high for dark paths; steady low to conserve battery on lit streets.
Step 7 — Read Real-World Reviews
Lumen ratings from manufacturers are often measured at peak output, not sustained output. Look for reviews that test brightness after 30+ minutes of continuous use.
Pros and Cons Summary
Stock Integrated LED Lights
Pros: Zero installation, no extra battery to charge, clean look, covered under scooter warranty.
Cons: Often underpowered for real-world night riding, fixed beam angle, drains main battery, hard to replace if damaged.
Aftermarket Clip-On LED Lights
Pros: Significantly brighter options available, independent battery, adjustable aim, portable (move between scooters or bikes), affordable entry point.
Cons: Adds clutter to handlebars, requires charging separately, quality varies widely by brand, can loosen over rough terrain.
Integrated Aftermarket Systems (Wired)
Pros: Clean install, can integrate with brake signals, no separate battery needed.
Cons: More complex installation, scooter-specific compatibility required, higher cost.
FAQ
Q: How many lumens do I need for an e scooter LED light?
For well-lit urban streets, 200–400 lm is sufficient for being seen. For illuminating the road ahead on unlit paths or at speeds above 15 mph, aim for 500–800 lm. High-speed or trail riding warrants 1000+ lm.
Q: Are e scooter LED lights legally required?
In most US states, yes — for nighttime riding. The typical requirement is a white front light and a red rear reflector or light. Requirements vary by state and city, so always check your local regulations.
Q: Will an aftermarket LED light drain my scooter's battery?
Only if it's wired into the scooter's electrical system. Most clip-on aftermarket lights have their own rechargeable battery and have zero impact on your scooter's range.
Q: Can I use a bike LED light on my electric scooter?
Yes, in most cases. As long as the handlebar diameter matches (22mm is standard for both), a quality bike headlight works perfectly on a scooter. The same applies to tail lights with universal seat post or clamp mounts.
Q: How do I stop my scooter light from rattling loose?
Use a small piece of rubber or silicone tape between the clamp and handlebar to increase grip and dampen vibration. Tighten the clamp bolt to the manufacturer's spec — overtightening can crack the mount, undertightening causes slippage.
Q: What's the difference between a flashing and steady LED light?
Flashing lights are more attention-grabbing and better for being seen in daylight or at intersections. Steady lights are better for illuminating the road ahead. Best practice: use steady mode for the headlight (so you can see) and flashing mode for the tail light (so you're seen).
Q: Do I need a front and rear light, or just one?
Both. A front light alone leaves you invisible to vehicles approaching from behind — statistically one of the highest-risk scenarios for scooter riders. A rear light alone means you can't see where you're going. The combination is the minimum safe setup.
Q: How waterproof does my e scooter LED light need to be?
For occasional rain exposure, IP65 is adequate. If you ride through puddles, heavy rain, or wet conditions regularly, look for IP67 or higher. Avoid anything below IP54 for outdoor use.
Share:
Best E Scooter in San Diego: How to Choose the Right Model for Your Ride
E Scooter Speed Limit: How Fast Can You Legally Ride?
1 comment
Can’t find anything on how to set the brightness settings of the headlights!