




Table of Contents
- Why DIY Troubleshooting Makes Sense
- Battery Won’t Charge or Drains Too Fast
- Motor Cuts Out or Throttle Doesn’t Respond
- Brakes Squealing, Weak, or Not Engaging
- Flat Tires and Tire Pressure Problems
- Display Error Codes and What They Mean
- Folding Mechanism Is Loose or Won’t Lock
- When to Stop DIY and See a Technician
- Preventive Maintenance Schedule
- FAQ
Why DIY Troubleshooting Makes Sense
DIY troubleshooting tips for common electric scooter issues can save you significant time and money — most problems that send riders to a repair shop are diagnosable and fixable at home with basic tools and a methodical approach. Electric scooters have fewer moving parts than cars or motorcycles, which means the failure points are relatively predictable and the diagnostic process is straightforward once you know what to look for.
That said, DIY troubleshooting has limits. High-voltage battery work, motor controller replacement, and structural frame repairs require professional tools and expertise. This guide covers the issues that fall squarely in the DIY zone — the problems that account for the vast majority of service calls and that any reasonably handy rider can address at home.
What You’ll Need
- A multimeter (essential for electrical diagnosis — a basic model costs $15–25)
- Allen key / hex wrench set (most scooter fasteners are M4–M8 hex bolts)
- Tire pressure gauge and pump with Schrader valve adapter
- Silicone lubricant spray (not WD-40, which attracts dirt)
- Your scooter’s user manual or the manufacturer’s error code list
- A clean, well-lit workspace with the scooter on its kickstand or leaned against a wall
Battery Won’t Charge or Drains Too Fast

Symptom: Scooter Won’t Charge At All
- Test the charger first. Plug the charger into the wall without connecting it to the scooter. The indicator light should illuminate (usually red or green). If it doesn’t light up, the charger is faulty — not the battery.
- Inspect the charging port. Look for bent pins, debris, or corrosion inside the port. Use a toothpick or compressed air to clear debris. Do not use metal tools inside the port.
- Check the charging port voltage. With a multimeter set to DC voltage, measure the voltage at the charger output plug. It should read close to the charger’s rated output voltage (e.g., 54.6V for a 48V system, 67.2V for a 60V system). If the reading is zero, the charger is defective.
- Check the battery voltage. A 48V battery should read 40–54V depending on charge state. A reading below 36V on a 48V pack indicates deep discharge — the BMS may have shut down the pack to prevent damage.
Symptom: Battery Drains Much Faster Than Usual
- Temperature: Lithium batteries lose 20–40% capacity in cold weather (below 40°F / 4°C). This is normal and temporary.
- Cell degradation: After 300–500 full charge cycles, lithium cells begin to lose capacity permanently. If your scooter is 2+ years old and heavily used, this is the likely cause.
- Parasitic drain: If the battery drains significantly over 1–2 weeks of storage, check whether the display or lights remain active after shutdown.
Charging Best Practices
- Charge at room temperature (60–77°F / 15–25°C) — never charge a battery that’s hot from riding or cold from outdoor storage
- Don’t leave the scooter on the charger for days at a time
- For long-term storage (1+ month), store the battery at 40–60% charge, not full or empty
- Use only the charger supplied with the scooter or a verified replacement with identical voltage and amperage ratings
Motor Cuts Out or Throttle Doesn’t Respond
Symptom: Throttle Has No Response
- Speed mode is set to zero or locked. Many scooters have a “P-setting” that limits maximum speed to 0. Check your manual for the unlock procedure — this is the most common cause of “throttle not working” calls to support lines.
- Throttle connector is loose. The throttle connects to the controller via a small 3–5 pin connector near the handlebar stem. Vibration can loosen this connection over time.
- Throttle hall sensor failure. Test by checking the throttle output voltage with a multimeter — it should vary smoothly from ~0.8V (released) to ~4.2V (full throttle). A flat reading indicates sensor failure.
- Controller fault. Check for error codes on the display first before assuming controller failure.
Symptom: Motor Cuts Out Under Load
- Thermal cutout: Motors and controllers cut power when they overheat. Allow 10–15 minutes of cooling before riding again. This is a safety feature, not a malfunction.
- Voltage sag: An aging battery may drop below the controller’s minimum voltage threshold under heavy load. The scooter recovers when load is reduced — this indicates the battery needs replacement.
- Loose phase wire connection: The three thick wires connecting the motor to the controller can develop loose connections, causing intermittent power loss and a jerky, stuttering motor.
Brakes Squealing, Weak, or Not Engaging

Symptom: Brakes Squeal
- Contaminated pads or rotor: Clean the rotor with isopropyl alcohol (90%+) and a clean cloth. Contaminated pads usually need replacement.
- Glazed pads: Overheated pads develop a hard glazed surface. Light sanding with 120-grit sandpaper can restore the surface, but severely glazed pads should be replaced.
- Rotor alignment: Spin the wheel and watch the rotor pass through the caliper — it should pass cleanly without contact. Minor bends can be corrected with a rotor truing tool.
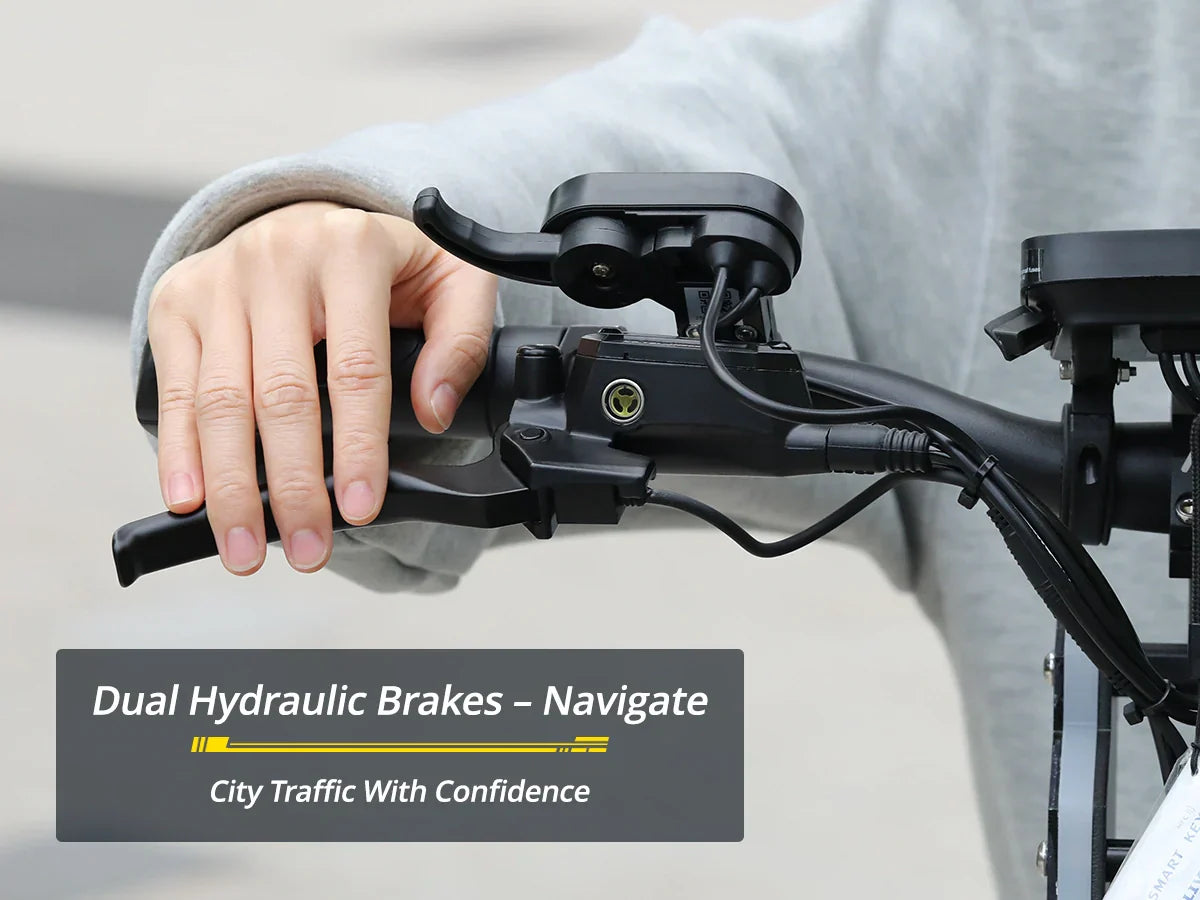
Symptom: Brakes Feel Weak or Spongy (Hydraulic)
Spongy hydraulic brakes indicate air in the brake line. Bleeding the brakes involves: locating the bleed port on the caliper, attaching a bleed kit, pushing fresh brake fluid through until no bubbles appear, then topping up the reservoir. Use the correct fluid type (DOT 4 or mineral oil — these are NOT interchangeable).
Symptom: Mechanical Brakes Need Adjustment
- Locate the barrel adjuster where the cable enters the caliper or lever
- Turn counterclockwise to increase cable tension (reduces lever travel before braking begins)
- If the barrel adjuster is fully extended, re-clamp the cable at the caliper with the slack taken up
- After adjustment, check that the wheel spins freely — pads should not drag on the rotor
Flat Tires and Tire Pressure Problems

Checking and Maintaining Tire Pressure
Most electric scooter pneumatic tires use Schrader valves (the same type as car tires). Recommended pressure is commonly 40–50 PSI for 10–12” tires. Check pressure monthly and before any long ride. Under-inflated tires are the leading cause of pinch flats and significantly increase rolling resistance.
Fixing a Flat: Tube vs. Tubeless
- Tubed tires: Repair requires removing the wheel, breaking the bead, extracting the tube, patching or replacing it, and reassembling — a 30–60 minute job with the right tools.
- Tubeless tires: Small punctures (under 6mm) can be repaired with a tubeless plug kit without removing the wheel — a 5–10 minute roadside repair.
Emergency Flat Fix: Tire Sealant
Injecting tire sealant (such as Slime) through the valve stem can temporarily seal small punctures and get you home. This is not a permanent fix — replace with a proper repair as soon as possible.
Display Error Codes and What They Mean
| Code | Common Meaning | First Step |
|---|---|---|
| E1 | Battery voltage too low | Charge the battery fully before riding |
| E2 | Battery voltage too high (overcharge) | Unplug charger; check charger output voltage |
| E3 | Motor phase wire fault | Check motor connector; inspect phase wire connections |
| E4 | Throttle fault / signal out of range | Check throttle connector; test throttle output voltage |
| E5 | Brake lever engaged at startup | Release brake levers fully before powering on |
| E6 | Controller overtemperature | Allow 15 minutes cooling; check for blocked ventilation |
| E7 | Motor overtemperature | Allow 15 minutes cooling; reduce load on steep hills |
| E8 | Hall sensor fault (motor) | Check motor hall sensor connector; may need motor service |
Always cross-reference with your specific model’s manual — code meanings can vary between controller manufacturers.
The Most Misunderstood Error: E5
E5 is the most common error code complaint on support forums, and it’s almost always a false alarm. Fix: squeeze and release both brake levers firmly several times, then power cycle the scooter. If E5 persists, check the small magnetic brake cutoff sensors on each lever — they can be misaligned or have a broken magnet.
Folding Mechanism Is Loose or Won’t Lock
Diagnosing Stem Play
Grab the handlebar and try to rock the stem forward and backward with the scooter stationary. Any movement at the folding joint indicates wear or loose fasteners. More than 2mm of play affects handling and should be addressed.
Tightening the Folding Clamp
- Fold and unfold the stem several times to ensure the hinge moves freely
- With the stem fully upright and locked, locate the clamp collar bolts (usually M5 or M6 hex)
- Tighten in small increments (quarter turns), alternating between bolts if there are two
- Re-check for play after each increment — over-tightening can crack the collar
- Apply medium-strength thread-locking compound (e.g., Loctite 243) to prevent bolts from loosening from vibration
When to Stop DIY and See a Technician
- Battery pack needs internal repair. Opening a lithium battery pack without proper training is a fire risk.
- Motor controller needs replacement. Controller programming often requires proprietary software.
- Frame has a crack or weld failure. A cracked frame is a safety hazard — do not ride until professionally assessed.
- You’re not confident in your diagnosis. Guessing at electrical repairs can turn a minor fault into an expensive one.
Preventive Maintenance Schedule
| Interval | Task |
|---|---|
| Every ride | Check tire pressure; inspect brake lever feel; check folding latch is fully engaged |
| Monthly | Inspect brake pads for wear; check all visible fasteners; clean folding hinge; check cables for fraying |
| Every 3 months | Lubricate folding hinge with silicone spray; inspect tire sidewalls for cracking; check connectors for corrosion |
| Every 6 months | Inspect brake fluid level (hydraulic); test battery capacity against rated range; inspect frame welds |
| Annually | Full brake service; replace brake pads if worn below 1.5mm; assess battery health |
FAQ — DIY Electric Scooter Troubleshooting
My electric scooter turns on but won’t move. What should I check first?
Start with the simplest causes: check that the speed mode isn’t set to zero or locked, check for error codes on the display, and verify that both brake levers are fully released. A completely unresponsive motor with no error codes often points to a loose throttle connector or a failed throttle hall sensor.
How do I know if my scooter battery needs replacement?
The clearest signs are: range has dropped more than 30–40% from when the scooter was new, the battery voltage sags significantly under load, or the battery takes significantly less time to charge than it used to. Most lithium scooter batteries last 300–500 full charge cycles — roughly 2–3 years of daily use.
Why does my scooter lose power on hills but work fine on flat ground?
This is almost always voltage sag from an aging battery or a motor undersized for your weight and the grade. Under heavy load, the battery voltage drops below the controller’s minimum threshold and the controller cuts power to protect itself.
Can I use WD-40 to lubricate my scooter’s folding mechanism?
No. WD-40 is a water displacer and light solvent, not a lubricant. It evaporates quickly and leaves a residue that attracts dirt and grit. Use silicone spray lubricant for plastic and rubber components, or light machine oil for metal-on-metal pivot points.
My brake lever feels spongy after I adjusted it. What went wrong?
Spongy feel after adjustment on hydraulic brakes usually means air entered the system — the brakes need to be bled. On mechanical (cable) brakes, a spongy feel usually means the cable housing is compressed or kinked.
How often should I check tire pressure on my electric scooter?
Check before every ride if you ride daily, or at minimum once a week. Pneumatic scooter tires lose 1–2 PSI per week naturally. Running under-inflated tires dramatically increases the risk of pinch flats and reduces range.
Is it safe to ride my scooter in the rain after a repair?
After any repair involving electrical connectors, allow the scooter to dry completely and apply dielectric grease to connectors before reassembly. Check your scooter’s IP rating — IP54 handles light rain, but no consumer scooter should be ridden through standing water.
Share:
Top Features to Look for in High-Performance E-Scooters
The Future of Electric Scooters: Trends and Innovations in 2026
1 comment
Hello onecna, love the gt7 model so far. I have one issue with it that I would like to address. I’ve had it for about a month or two now and my front break damn near does nothing. It’s really spongy/just goes straight to the handle bar damn near and then engages. As to where my back break the second I grab it, it engages. I noticed it being weird about two days ago. How do I approach this. Do I just bleed the line if so how?