





Electric Scooter Maintenance Checklist: 15 Things to Check Every Year
Electric Scooter Maintenance Checklist: 15 Things to Check Every Year gives you a simple way to catch wear before it becomes a safety problem. An annual inspection can reveal low tire pressure, loose fasteners, weak brakes, battery issues, damaged cables, and other small faults that are easy to miss during everyday rides.
You do not need to disassemble the whole scooter or be a professional mechanic to start. Begin with a clean visual inspection, follow the owner’s manual for model-specific limits, and send safety-critical repairs to a qualified technician when you are unsure. This guide explains what to check, why each item matters, how to inspect it, and when to replace or service it.

Quick overview: what should an annual scooter check include?
A complete yearly check should cover the parts that affect control, stopping, power, and structural safety. That means tires, wheels, brakes, steering, folding hardware, suspension, fasteners, lights, controls, battery, charger, charging port, fenders, and the scooter’s service history.
The best time to do the full inspection is before a high-use season, after long storage, or before a long trip. A yearly check does not replace quick checks before each ride. Tire pressure, brake response, visible damage, and battery condition still deserve regular attention.
Why annual electric scooter maintenance matters
Electric scooters experience vibration, curb impacts, water spray, dust, heat, repeated charging, and frequent braking. Those stresses can loosen hardware or wear parts even when the scooter still feels normal. A problem that is inexpensive to correct early can become a damaged wheel, unsafe brake, electrical fault, or interrupted commute if ignored.
Maintenance also helps you understand your scooter’s normal condition. Once you know how the tires, brakes, steering, and controls should feel, unusual noise or movement becomes easier to identify. Keep notes and photos of anything you inspect, replace, or ask a technician to repair.
Electric scooter maintenance checklist: 15 things to check every year
1. Inspect the frame, deck, and stem for damage
What to check: Look over the frame, deck, stem, welds, and major joints under good light. Watch for cracks, dents, bending, deep scratches near a joint, or signs that a part has shifted.
Why it matters: Structural damage can affect stability and may worsen under repeated vibration. A cosmetic mark is not always a safety issue, but a crack near a load-bearing area deserves immediate attention.
How and when: Clean away dirt first, then inspect before the first long ride of the season. Do not continue riding if you see a crack, significant bend, or separation around a structural joint.
2. Check tire pressure and condition
What to check: Inflate pneumatic tires to the pressure recommended by the manufacturer. Look for slow leaks, cuts, bulges, embedded glass, exposed cords, or a valve that leaks when moved.
Why it matters: Incorrect pressure affects grip, range, comfort, braking, and the chance of a pinch flat. Overinflation can reduce contact with the road, while underinflation can make steering vague and increase heat in the tire.
How and when: Use a pressure gauge rather than squeezing the tire by hand. Check pressure when the tires are cool, and repeat the check at least monthly during regular use.
3. Measure tread wear and replace worn tires
What to check: Examine the tread for a flattened center, uneven wear, cracking, or a tread pattern that has become difficult to see. Compare both tires because uneven wear can point to alignment, load, or suspension problems.
Why it matters: Tread and rubber condition help the scooter maintain traction, especially on imperfect or damp pavement. Old rubber can harden and lose grip even if it still appears inflated.
How and when: Follow the tire maker’s wear guidance and replace a tire when the tread, sidewall, or casing is compromised. Do not patch a tire when the damage is in the sidewall or the manufacturer does not approve a repair.
4. Test brake response, pads, and rotors
What to check: Squeeze the brake levers for a firm, predictable response. Look at pads and rotors for excessive wear, deep grooves, contamination, bending, or unusual discoloration. Listen for scraping or grinding.
Why it matters: Brakes are a primary safety system. A soft lever, delayed stopping, pulsing rotor, or brake that rubs continuously can indicate adjustment, wear, contamination, or a hydraulic issue.
How and when: Test at walking speed in a clear area, then inspect the hardware. Never spray lubricant on a brake rotor or pad. Have hydraulic systems and uncertain brake faults serviced by a qualified technician.
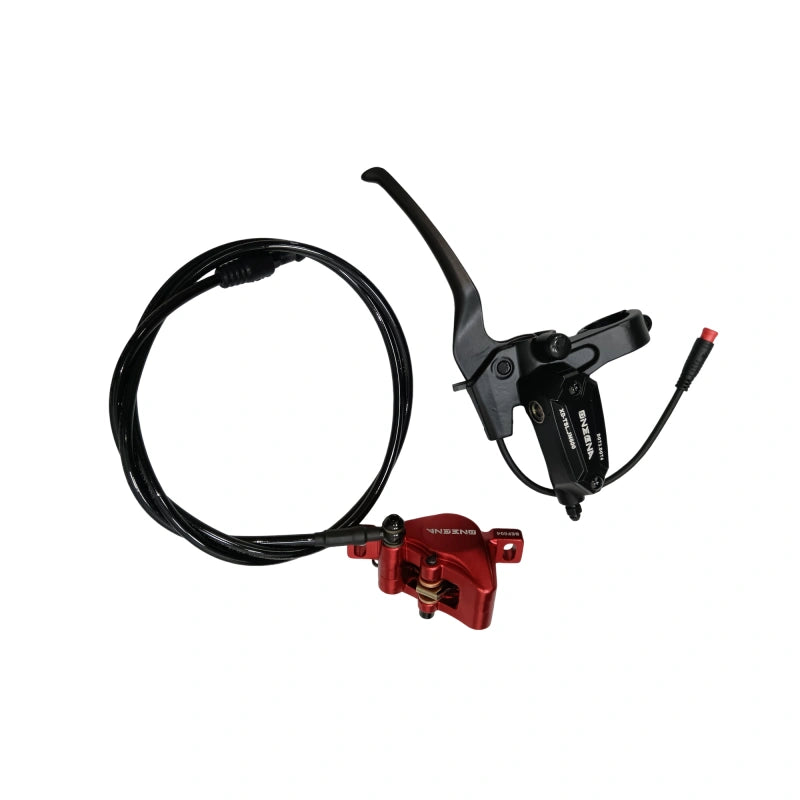
5. Check brake cables, hoses, and lever hardware
What to check: Trace mechanical brake cables or hydraulic hoses from the lever to the caliper. Look for fraying, sharp bends, leaks, loose guides, rubbing, or a lever that feels different from the other controls.
Why it matters: A cable or hose can fail even when the brake pads look acceptable. Routing problems can also cause rubbing or restrict steering.
How and when: Turn the handlebar gently from side to side while checking that the cable or hose does not pull tight. Replace damaged lines rather than trying to hide the damage with tape.
6. Check wheel play, axles, and bearings
What to check: With the scooter switched off and supported safely, spin each wheel and listen for grinding, clicking, or rough spots. Check for side-to-side movement that is not part of the normal design.
Why it matters: Loose axles or worn bearings can affect tracking, braking, and motor alignment. A small amount of play can become more serious after repeated riding.
How and when: Compare the wheels with each other and consult the manual before tightening axle hardware. Use only the specified torque and never guess at a critical fastener.
7. Inspect the steering column and folding mechanism
What to check: Turn the handlebar slowly and look for notchiness, looseness, clicking, or movement between the stem and deck. If the scooter folds, inspect the latch, hinge, locking pin, and safety catch.
Why it matters: Steering play can make the scooter wander or react unpredictably. A folding mechanism that does not lock completely can allow movement while riding.
How and when: Test the lock without forcing it. Do not ride if the stem does not lock securely, the latch opens unexpectedly, or the hinge shows cracking or excessive play.
8. Tighten and mark-check accessible fasteners
What to check: Inspect visible bolts around the stem, handlebar, deck, fenders, brake hardware, suspension, and accessories. Look for missing hardware, damaged threads, or a fastener that has backed out.
Why it matters: Vibration gradually changes fastener tension. Loose hardware can create rattles at first and a serious failure later.
How and when: Use the torque values in the owner’s manual. If a bolt uses threadlocker, a locking nut, or a special washer, replace it with the correct part rather than substituting a random bolt.
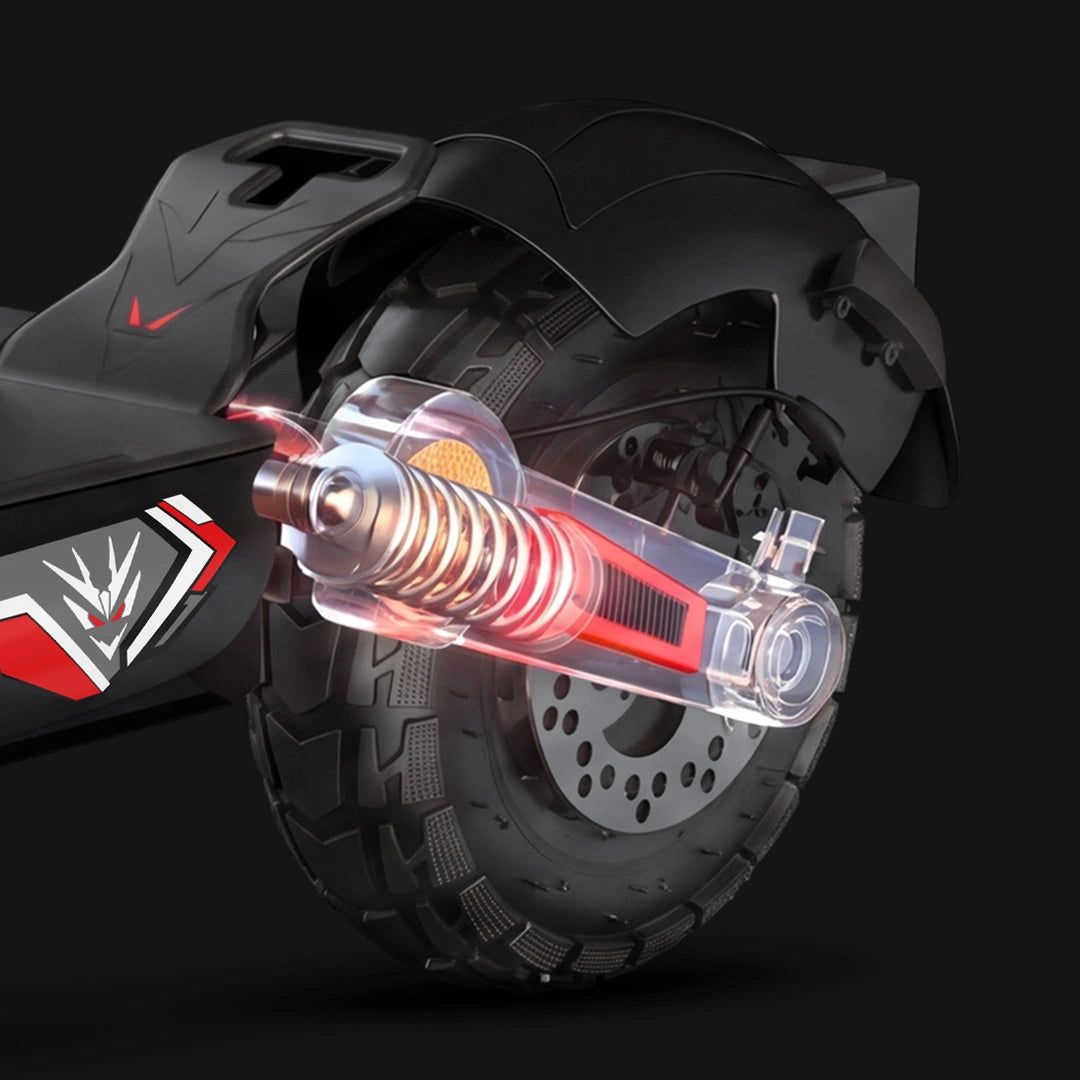
9. Inspect suspension components
What to check: Examine suspension arms, springs, shocks, bushings, seals, and mounting points. Look for leaks, cracks, bent parts, unusual sag, or a new clunk over small bumps.
Why it matters: Suspension supports control and comfort, but worn or damaged parts can also affect tire contact and braking stability.
How and when: Clean the area and compare the left and right sides where applicable. Do not add oil or change preload unless the manufacturer provides instructions for that component.
10. Test the display, throttle, lights, and switches
What to check: Turn the scooter on and test the display, throttle, riding modes, headlight, tail light, brake light, turn signals, horn, and other switches. Look for flicker, delayed response, error codes, or controls that stick.
Why it matters: Controls and lights affect both operation and visibility. An intermittent fault can become a complete failure after vibration or moisture exposure.
How and when: Test every control while the scooter is stationary. Record any error code exactly as shown and use the manual or manufacturer support before clearing it or replacing parts.
11. Check the battery, charger, and charging behavior
What to check: Look for swelling, cracks, heat damage, unusual odor, damaged insulation, frayed charger leads, bent pins, or a charger that becomes unusually hot. Note whether charging time or range has changed significantly.
Why it matters: Lithium-ion batteries store substantial energy. Physical damage, overheating, or abnormal charging should be treated seriously rather than tested repeatedly.
How and when: Charge on a clean, dry, non-flammable surface with the approved charger. Stop using a battery or charger that is swollen, leaking, smoking, severely hot, or visibly damaged, and contact the manufacturer or a qualified technician.
12. Inspect the charging port and electrical covers
What to check: Make sure the charging-port cover closes securely and that there is no dirt, corrosion, moisture, bent contact, or loose connection. Inspect rubber plugs and seals for cracking or loss.
Why it matters: The charging port is an exposed entry point for water and debris. A damaged cover can reduce the scooter’s intended protection level.
How and when: Inspect before charging and after wet rides. Keep the port dry and never charge while the port, plug, or surrounding surface is damp.
13. Check fenders, mudguards, and cable clearance
What to check: Look for cracks, loose mounts, rubbing tires, missing screws, and fenders that move into the wheel path. Confirm that cables and hoses do not touch a tire or pinch at full steering lock.
Why it matters: A loose fender can contact a moving wheel. Proper mudguards also reduce spray reaching the deck, rider, and electrical openings.
How and when: Spin the wheel by hand after checking clearance. Recheck after transporting the scooter or riding over rough surfaces.
14. Review firmware, error history, and service updates
What to check: Review the owner’s manual and manufacturer support information for safety notices, firmware guidance, known service updates, or recurring error codes. Note any change in performance since the last season.
Why it matters: Some issues are not visible during a physical inspection. A repeated error or update notice may relate to the controller, battery management, display, or braking system.
How and when: Use the official app or support channel only when recommended for your model. Do not install unofficial firmware or reset an error simply to make it disappear.
15. Complete a controlled test ride and record the results
What to check: After the stationary inspection, test acceleration, braking, steering, lights, suspension, and unusual noises in a quiet, low-risk area. Confirm that the scooter tracks straight and responds consistently.
Why it matters: Some problems appear only when the scooter is loaded and moving. A short controlled ride is the final check that the systems work together.
How and when: Start slowly and stop immediately if you notice wobble, delayed braking, power cutouts, grinding, a burning smell, or a new warning. Record the date, mileage if available, parts replaced, and any follow-up service needed.
When should you perform each type of scooter maintenance?
Before every ride: Check tire condition, brake response, visible damage, steering feel, and battery level. This should take less than a minute once it becomes routine.
Every few weeks during regular use: Check tire pressure, clean away grit, inspect fasteners, and look at brake wear. Wet, dusty, hilly, or heavy-load riding may require more frequent checks.
Every year: Complete all 15 checks in this guide, review the service history, inspect battery and charging equipment, and arrange professional service for anything outside your skill level.
After storage, a crash, deep water, or unusual impact: Inspect before riding, even if the annual date has not arrived. A curb strike or water event can create a safety issue immediately.
How to make an annual maintenance routine easier
Choose one repeatable date, such as the start of your busiest riding season. Clean the scooter first, gather a pressure gauge, flashlight, soft cloth, and the owner’s manual, then work from front to back. Take a photo of parts that may need replacement and record the exact model or part number before ordering anything.
Separate simple cleaning and inspection from repairs that involve brakes, battery enclosures, steering hardware, electrical connectors, or structural parts. The goal is not to prove that you can do every repair yourself. The goal is to identify problems early and make sure the scooter is safe before it returns to the road.
What not to do during electric scooter maintenance
- Do not pressure-wash the scooter or direct water into the deck, motor, controls, or charging port.
- Do not charge a wet, damaged, swollen, or unusually hot battery.
- Do not use automotive lubricants on brake rotors, pads, tires, or electrical connectors unless the manufacturer specifically permits it.
- Do not guess at torque values for axles, stems, brakes, or suspension hardware.
- Do not ride after a serious impact until the frame, steering, wheels, and brakes have been checked.
- Do not replace safety-critical parts with an unverified substitute.
FAQ: electric scooter maintenance
How often should an electric scooter be serviced?
Do a quick safety check before every ride, inspect wear items regularly during the riding season, and complete a full 15-point inspection at least once a year. Heavy use, wet weather, rough roads, hills, and frequent carrying can justify more frequent professional service.
What is the most important part of an annual scooter check?
Brakes, tires, steering, wheels, and the frame deserve the highest priority because they directly affect control and stopping. Battery and charging safety are also critical. If any of these areas show damage or unusual behavior, stop riding until the issue is resolved.
Can I do electric scooter maintenance myself?
You can usually handle cleaning, visual inspections, tire-pressure checks, and basic condition checks if the manual allows them. Brake work, battery repairs, structural repairs, hydraulic systems, and uncertain electrical faults should be handled by a qualified technician.
How do I know if my scooter tire needs replacing?
Replace it when the tread is worn, the sidewall is cracked or bulging, the casing is damaged, it loses air repeatedly, or the manufacturer’s wear limit has been reached. A tire that looks acceptable but has hardened with age may also need attention.
Should I lubricate my electric scooter?
Only lubricate parts identified by the manufacturer, and use the specified product. Keep lubricant away from brake pads, rotors, tires, charging ports, and electrical connectors. Many modern components are designed to operate without user-applied lubricant.
What should I do if my scooter makes a new noise?
Stop and identify when the noise occurs: while braking, turning, accelerating, folding, or rolling freely. Check for obvious loose hardware or debris, but do not keep riding to see whether the noise disappears. Seek service if the source is not clear.
Bottom line: A yearly electric scooter inspection is a small investment of time that can prevent avoidable failures. Work through all 15 checks, follow the model’s manual, record what you find, and treat brakes, steering, tires, structural parts, batteries, and charging faults as safety priorities.
Share:
Are Electric Scooters Waterproof? IP Ratings, Rain Riding & Water Resistance Explained